Categories
Categories are a main input area to customize your Pole Studio Manager and one of the first places you should begin set-up. For each category you will want to set-up the options that fit your business. Below are the are tips trips and explanations of the category options and where they are used in the software.
Blue highlight – indicates this is a very important setting to consider
Creating & Editing Categories
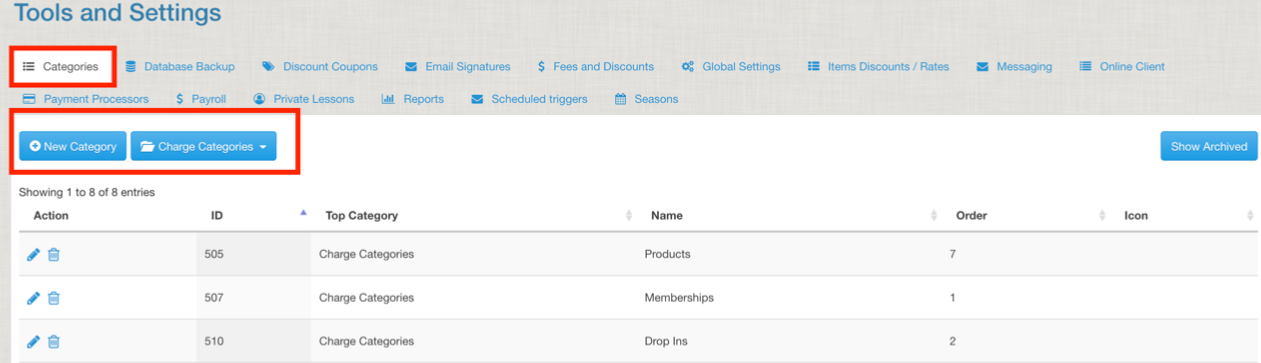
Find “categories” under the “Settings” drop down.
Select that category you wish to edit from the drop down list on the upper left.
Edit an existing category by clicking on the pencil on the left of each row.
Archive an existing category by clicking on the trash can on the left of each row.
Add a NEW category to the list be clicking the “new category” box on the upper right.
A pop-up box will open.
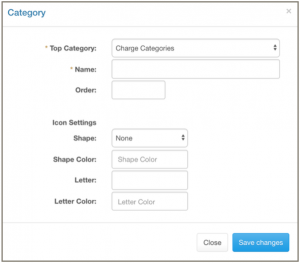 Make sure the correct “Top Category” type is selected.
Name your new category.
Select the order (numerical number) you would like the new category to appear in relation to the others in this list. For example, if it is used a lot give it a low number so it is at the top and easiest to access when the list of options comes up.
Ignore the “Icon Settings” for all categories except Membership.
Types of Categories
Billing Schedules
Charge Categories
Class Genres
Class Levels
Class Locations
You are not charged for having “multiple locations” in PSM if you add locations here; only if a second payment processor account is added do we consider it a second location.
In global settings you can have your calendar show locations all together or on separate tabs. You can choose to have one location but if you have an in-person program as well as an online program you may find it helpful to set up both here so you have an easy filter options and the ability to separate out this classes easily in the future.
Class Programs
When creating a class you will need to select a “class program”. These are also used as a filter item for students when searching for a class in the online client (if you turn that on in global online client settings) and as a filter for you when viewing your list of classes.
Class Rooms
You can turn “class rooms” on and off in the global settings. If you turn it on you will need to select a “class room” when creating a class. Under settings you can choose where this room will be displayed, options include: on the staff calendar and on the student schedule. Class rooms, if enabled, are always shown on the daily view
Note that this feature shows the room but will not prevent you from double booking a space.
How Hear Items
When filling in the student profile informant they can list what how they heard about your studio. You would enter possible marketing/advertising avenues here for them to choose from. This data can be pulled up in the “how did you hear” report.
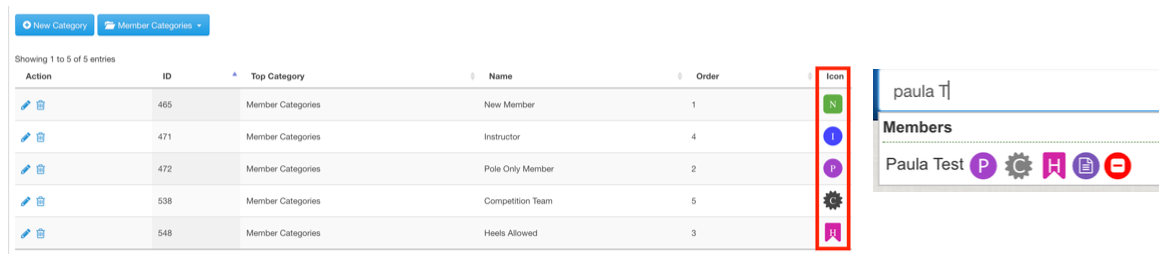
Member Categories
This is the start of a very robust aspect of Pole Studio Manager. The membership features are versatile and students can have multiple membership types active at once. In the category section you will create your possible memberships. These will then be used to: run membership reports or address/email lists, send mass emailings, gain access to on-demand videos, get discounts, be able to register for different types of classes, and more. The membership categories give students access to many different things within the system and you create the basic shell here. You WANT to select an icon for membership categories because it will then be next to the student name in the roster to quickly identify them.
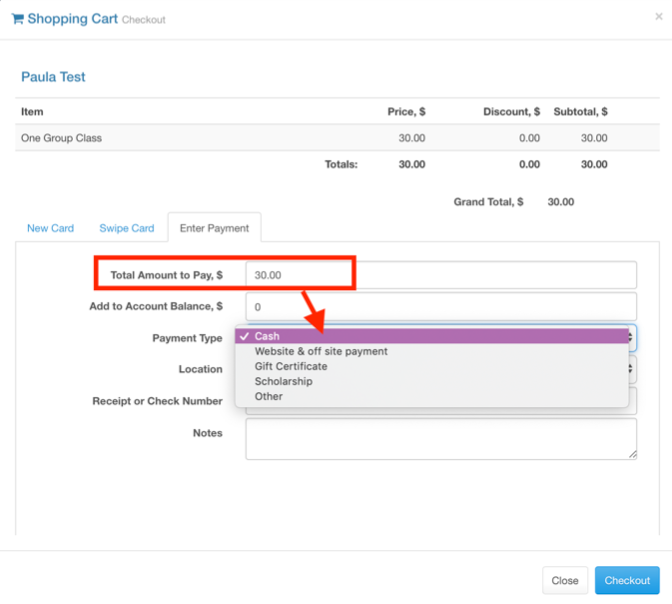
Payment Methods
Add payment methods that your studio uses BESIDES credit card, ACH and account here (those three are built into the software). The payment added here will be selected from the drop down menu in the store and will show up (if used) on the gross income summary report.
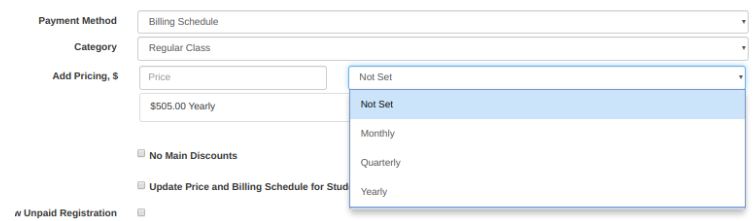
Payment Schedules
Part of the global tuition option, Pole & Aerial studios will generally not use this. Payment Schedules allow you to have different payment options for a class, so maybe monthly is $100/month, quarterly $260, or annually $800.
Private Lesson Categories
This does not need to be filled out, the system has been updated to include this in better ways and this is from the old system that some studios still use but new studios will not.
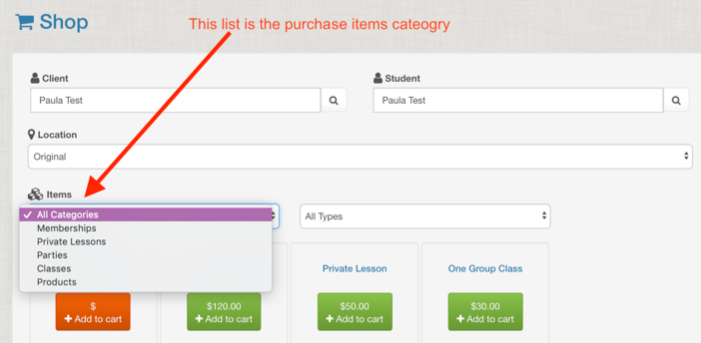
Purchase Item Categories
You select a “purchase item category” when creating a sales item. These are then displayed in the shopping cart as a drop down menu to help you quickly find the specifically sales item.
Size Systems
Set up this category if you sell costumes through your company and need to have the size charts with measurements to help organize ordering.
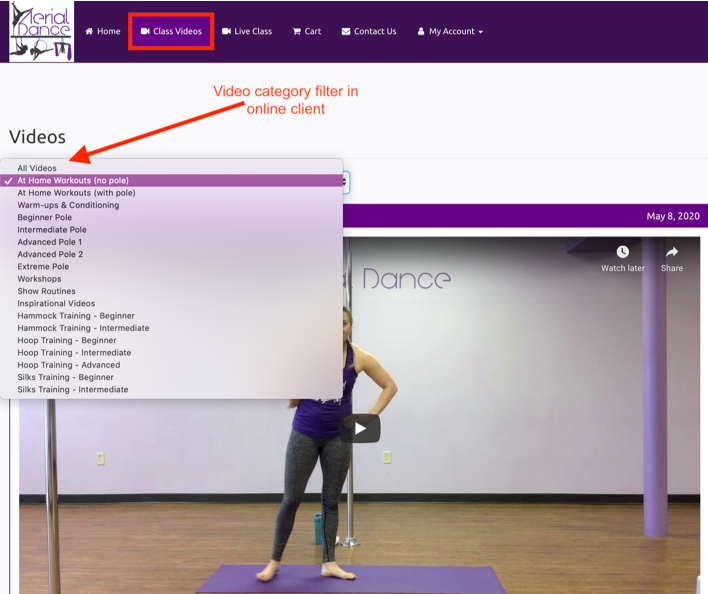
Video Categories
When using the “on demand” class videos feature, you have the option to select a video category. This then appears as a filter option in the student online client to help them filter their videos and find the one they are looking for.